


Blinkit was formerly known as Grofers and has become one of India’s leading instant delivery platforms, which connects sellers with buyers looking for instant delivery of things like groceries, essentials and much more. Blinkit has an ultra-fast delivery model, which helps buyers get products in 10-20 minutes.
According to a report by Kearney, India’s FMCG market is expected to grow by 8% to reach INR 78 lakh crore by 2029, where quick commerce plays a vital role. The quick commerce industry is expected to grow threefold between 2024 and 2027, from INR 1.5 lakh crore to 1.7 lakh crore. Quick commerce growth is expected to extend to all the town populations of 500,000 or more while achieving deep penetration among Indian 1 households (households with an annual income of ₹6 lakh or more).
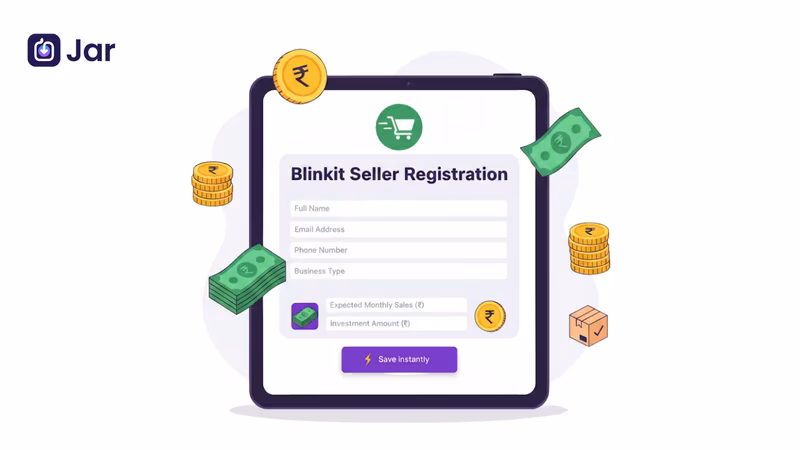
Whether you are a local retailer, D2C brand, or an established seller, you can register on Blinkit to scale your operations. Here is a complete guide for you, which includes a step-by-step process of seller registration, documents required and a few tips on how you can be successful as a blinkit seller in 2025-26.
What Is Blinkit?
Blinkit was founded in 2013 by Albinder Dhindsa and Saurabh Kumar in Gurgaon. Blinkit was formerly known as Grofers when it originally began. It is owned by Eternal Limited, which is its parent company. It is one of the leading quick commerce platforms in India, which delivers groceries, daily essentials, stationery, Beauty and personal care, and household essentials within minutes, through a network of dark stores and local partners.
Blinkit Business Model
Before you start selling as a seller on Blinkit, it is essential for you to know the model it operates on. Blinkit workers on a hyperlocal delivery model, using a network of dark stores and multiple delivery partners across high-demand areas. A few key elements of their business model include:
1. Dark Stores: These are the hyperlocal warehouses which help in maintaining inventory and reducing delivery time.
2. Technology and AI: Advanced AI-driven algorithms help predict demand and optimise stock placement and streamline logistics for partners, which ensures that the right products are available at the right time, reducing stockouts.
3. Strategic Partnerships: Blinkit partners with brands, suppliers and retailers to create a vast product offering to customers.
4. Customer Centric Approach: It provides a seamless mobile app experience with real-time delivery tracking, personalised recommendations based on past orders, and other metrics.
If you are not a seller and are looking to invest, you can also opt for a Blinkit Franchise.
Who can sell on Blinkit?
Now that you know how Blinkit operates, let’s understand what requirements you need to meet to be a seller on Blinkit:
1. Indian Roots
You or your business entity must be an Indian resident, or a legally registered business in India.
2. Business Registration
A valid GSTIN(Goods and Services Tax Identification Number) is mandatory for selling taxable products.
3. Bank Account
You will need to have an active bank account to receive the payments. Blinkit prefers a current account for business.
4. Background check
The business should have a clean business background and no ongoing disputes related to previous trade or business dealings.
5. Location
Your business must be located in a Blinkit serviceable area. If Blinkit does not deliver to your location, you will not be able to sell products there.
6. Product Categories
Blinkit offers categories like grocery, dairy, bakery, snacks, beverages, packaged food, household items, stationery and personal care.
7. Smartphone & Internet
This is required to manage the Blinkit partner app for order tracking and delivery updates.
8. Consistent Stock
Businesses must ensure that the products are available regularly, as stock-outs can lower rankings.
Apart from the above legal and operational requirements, you need to be any of the following:
- Brand owner
- Distributor
- Manufacturing
- Authorized reseller
This is to have an infrastructure to fulfil orders and comply with regulatory requirements.
Documents required to register
Apart from operational and legal requirements, you are also required to submit some essential business documents, which are:
- Active Email ID
- Active Mobile number
- GST registration
- PAN card (for individual and business)
- Aadhaar card
- Business registration certificate (e.g., Company Incorporation Number (CIN) or Udyam Registration)
- Business address proof
- Bank account details (account number, IFSC code, bank name, branch, A cancelled cheque or bank statement)
- FSSAi license (for food products)
- Any other product-specific Licenses (Crucially Important!)
- Drug license (if you are selling medicines or pharma products)
- Trade license
- Trademark certificate (for brand owners) or brand authorisation letter (if you are an authorised reseller of another brand)
Products that can be sold on Blinkit
Here are the product categories that you can sell on Blinkit:
- Fresh fruits and vegetables
- Pet Care
- Baby care
- Magzines
- Sweets
- Tea, Coffee & Health Drinks
- Beauty & Cosmetics
- Dairy, Bread & Eggs
- Chicken, Meat & Fish
- Breakfast & Instant Food
- Atta, Rice & Dal
- Cleaning Essentials
- Digital Goods
- Personal Care
- Organic & Gourmet
- Personal Care
- Cold Drinks and Juices
- Ice Cream & Frozen Desserts
- Bakery & biscuits
- Masala, Oil & More
- Toys & games
- Books
- Stores
- E-cards
Here is a much detailed list of items which you can sell on Blinkit.
Products that can not be sold on Blinkit
Selling the below list of products against the platform policy can result in suspension of the seller's account. So, you need to know the list of these things:
- Alcohol
- Arms and ammunition
- Hazardous chemicals
- Products without proper certification
- Other items prohibited by law
Are you into clothing? You can look to expand your business on the popular e-commerce site, Myntra. Check out the Myntra Seller Registration guide.
Blinkit Registration Fees & Commission Rates
To become a seller on Blinkit, there is no registration fee required. However, there is a commission you need to pay on the order you receive. There is also a separate service fee which is separate and covers the entire onboarding process. Here is a detailed breakdown of the cost:
1. Commission
On the orders that you’ve received on Blinkit, you need to pay a commission fee that varies based on the product categories. Below is a breakdown of the approximate commission charged:
| Product Category | Commission Rate | Additional Fees |
| Groceries & Essentials | 8-12% | Delivery charges apply |
| Food & Beverages | 10-15% | Delivery charges apply |
| Personal Care | 12-20% | Delivery charges apply |
2. Tax
You will incur an 18% GST on the commission fee Blinkit charges. 1% TCS (Tax Collected at Source) will also be applied to your selling price.
3. Fulfilment Fees
In case Blinkit manages the product packaging, logistics and warehousing, there is an additional fulfilment cost. Sellers mostly operate in this way.
4. Other Optional Fees
Other potential charges can be inwarding fees, storage fees, inventory recall fees, and deductions in case of customer returns. The aforementioned per-product activation fee (e.g., ₹25,000) is also a high potential cost.
Step-by-step Process of Registering as a Blinkit Seller
Here is the step-by-step process of setting up your seller account on Blinkit
Step 1: Head to Blinkit Seller Portal
Visit the official Blinkit seller portal and click on the “Sell on Blinkit” button.
Now enter your active email address, and you will receive an OTP.
Enter the OTP
Step 2: Fill in the required details
Once the email verification is done, you need to enter the necessary details of your business.
Select the selling category, online selling platform, your name, designation and mobile number.
Enter the OTP received on your registered mobile number and click on the “Save and continue” option to move on to the onboarding process.
Step 3: Verify GST information
Enter the 15-digit GSTIN (Goods and Services Tax Identification Number). This helps Blinkit automatically collect your business information.
Select “Verify” to confirm that the GSTIN is registered in your name.
Step 4: Fill in your Brand Details
Enter your Brand name, description and other details asked by Blinkit.
This will help Blinkit list your product under the relevant category.
Step 5: Add Your Bank Account Details
Enter your bank account details, like IFSC code, account number, etc., to receive payment from Blinkit.
Make sure to provide accurate details in order to avoid any issues related to payment in the future.
Step 6: Set Your Location
Blinkit serves in specific hyperlocal areas. You need to keep your products in the shops or stores that fall under those delivery areas.
Which means you don’t need to build a special warehouse or shipping hub to sell on Blinkit. You just need to set the location under those delivery zones.
Step 7: Upload Digital Signature
Now, you need to upload your digital signature to the page.
Step 8: Final Verification
This is the final step in the process, where you need to verify all the details you’ve entered. Make sure you verify all the information correctly.
Once you have confirmed all the information, click on “Submit”.
The Blinkit team will review the onboarding request and will send a confirmation email once the request is approved.
Listing Products on Blinkit
Once you’ve become a seller, you can’t list your products and start selling them on Blinkit. But a category manager will be assigned to you. They will act as a single point of contact for onboarding and scaling your business on the platform. Here is the process-
1. The CM connects with you to discuss the terms.
2. You negotiate margins, investments, promotional budgets, launch cities, and other policies.
3. Once both parties have agreed, the CM initiates the New Product Introduction (NPI) process.
4. You submit product data, images, pricing, barcodes, and legal documents.
5. Once approved, Purchase Orders are triggered.
This ensures quality and consistency across Blinkit’s dark store network.
Optimise your Blinkit Storefront
Once you have added the products, make sure to optimise the listings by:
1. Customising your profile: Add a logo and banner to show your brand identity.
2. Organise products: Categorise the products effectively to help the user find your products.
3. Highlights the bestsellers: Feature the popular products to draw user attention and boost sales.
An optimised storefront can improve customer experience and boost sales.
Leveraging Blinkit Tools
For sellers, Blinkit provides a bunch of tools to enhance the selling experience:
1. Seller app
This is to manage order, inventory and customer interaction anytime from anywhere.
2. Data Inisghts
Sales data is provided by blinkit to the seller for them to understand the customer preference and adjust inventory accordingly.
3. Promotions and Campaigns
You have the opportunity to increase product visibility by participating in Blinkit’s promotions and attract more customers.
How to Succeed on Blinkit as a Seller
1. Leverage Data & Insights provided by Blinkit
Use data-driven insights to create a strategy and position inventory across locations.
2. Maintain Quality & Freshness
Sell high-quality products and great packaging, which will enhance customer satisfaction and reduce returns and will also increase chances of reorders.
3. Pricing
Monitor the market trends and offer competitive pricing and deals that encourage repeat purchase. Align MRP, offer price, and platform price.
4. Participate in Campaigns
Leverage Blinkit’s promotional tools to boost visibility during key sales periods.
5. Inventory Management
Using the insights and data provided by blinkit, make sure to maintain the optimum level of inventory. Inaccurate inventory can lead to cancellations, missed sales, or worse, sending out expired goods. Also, avoid near-expiry stock, focus on high-turnover SKUs for metro cities.
6. Nomenclature
Add clear product titles and descriptions for users. Ensure barcode and Image compliance
7. Start Small
Start scaling in 1-2 cities first, and then scale nationally.
Why you should sell on Blinkit?
Blinkit stands out in the quick commerce sector, delivering products within minutes to customers across India. By selling on Blinkit, you gain access to:
1. Customer Base
You can reach a wide range of customers who are looking for quick deliveries.
2. Fast Delivery Network
Leverage Binkit’s logistics to ensure timely deliveries.
3. User-Friendly Platform
Through Blinkit’s seller platform, you can manage the orders and inventory easily.
4. Seamless Seller Tools
Access a bunch of tools which will help manage inventory, orders, and payments efficiently.
5. Focus on Essentials
Perfect for sellers of groceries, personal care, and household products.
Compared to other platforms, Blinkit’s focus on speed and efficiency makes it a preferred choice for both sellers and customers in the quick commerce space.
If you're a business owner looking to simplify your finances, download the Jar App for smart money tools and daily savings.
Conclusion
From onboarding to product listing and optimising performance, selling on Blinkit is a straightforward process designed for both new and established businesses.
As quick commerce continues to expand across India, sellers who join Blinkit early and build a strong operational foundation stand to gain the most. It’s a platform built for efficiency, reach, and long-term growth.
FAQs
Do I need a GST number to sell on Blinkit?
Yes, a GSTIN registration number is necessary to sell on Blinkit.
What kind of products can I sell?
You can sell a number of items like groceries, packaged food, snacks and beverages, electronics, personal care, and household essentials.
How much commission does Blinkit charge?
Blinkit’s commission rates vary based on product categories. For Groceries & Essentials, the commission ranges from 8–12%. Food & Beverages typically fall within a 10–15% commission range, while Personal Care products are charged a higher commission of 12–20%. Apart from these category-wise commissions, delivery charges apply separately across all categories as a common additional fee.
How do I get paid?
Payments are settled to your registered bank account weekly or bi-weekly after deducting commission.